How to install and setup multiple android SDK home?
1. Introduction
Sometimes, we need to install multiple android SDK in one PC, for example, you have some legacy android projects which need some old android sdk build tools , and you also want to try the newest android studio to learn the new android developing skills, but you found that if you use the new android sdk, your legacy project would not work. So, you need two different android sdk for different purposes.
This post would demo how to install and setup multiple android SDK home. I would use a macbook pro(macOS Sierra 10.12), if you use windows, you can reference this post and try with the same idea.
2. Environments
- Android Studio 3.1
3. How to install a new android SDK ?
-
- Open Android Studio, click “Tools” –> “SDK Manager”, would popup a window like this
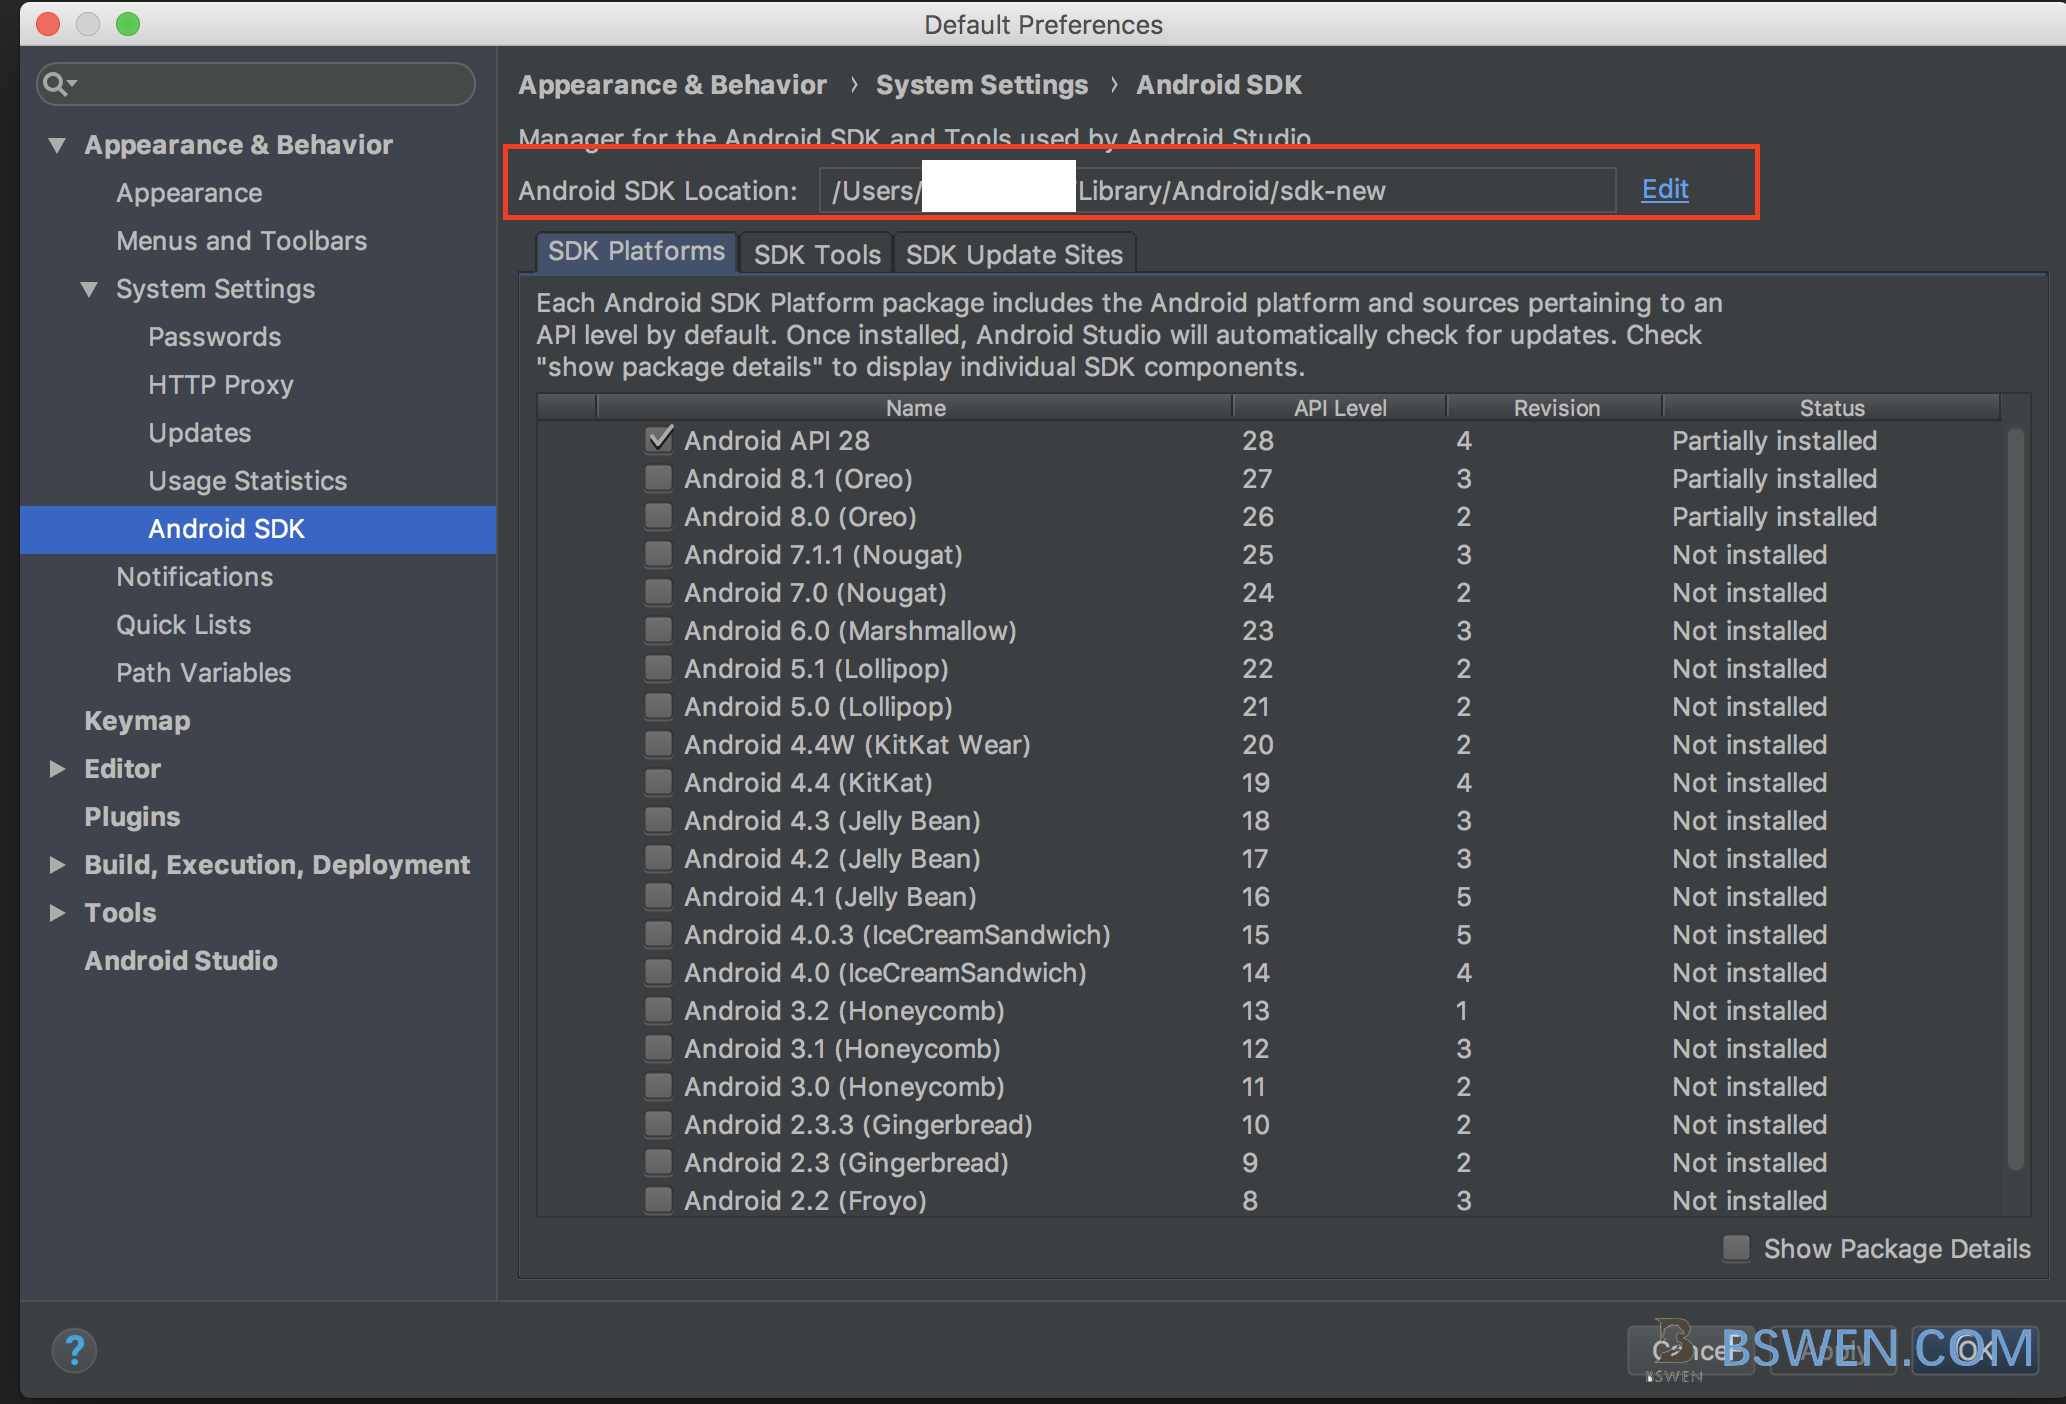
- Open Android Studio, click “Tools” –> “SDK Manager”, would popup a window like this
-
- Click the “Edit” button as shown in the above picture, choose your new SDK location
-
- Confirm and wait for the new SDK to be installed
4. How to switch between the android SDKs ?
Close your android studio or the IntelliJ IDEA ,then do the follows:
Change your system envrionment settings like this:
export ANDROID_HOME=/Users/xxx/Library/Android/sdk
export ANDROID_SDK_ROOT=$ANDROID_HOME
export PATH=$PATH:$ANDROID_HOME/platform-tools:$ANDROID_HOME/tools
If you want to change to the new SDK installation, e.g. “/Users/xxx/Library/Android/sdk-new”, change the above settings like this:
export ANDROID_HOME=/Users/xxx/Library/Android/sdk-new
export ANDROID_SDK_ROOT=$ANDROID_HOME
export PATH=$PATH:$ANDROID_HOME/platform-tools:$ANDROID_HOME/tools
Then open your android studio or IntelliJ IDEA again.